

I revisited the gilding idea today. I just know there is a way to do it that will enhance the qualities of the design without looking tacky or "applied." Instead of a brush, I used a calligraphy pen nib and that gave me a lot more control over the adhesive sizing. Now I am able to follow a line instead of just doing dots, which I think is getting more to the look that I am interested in.
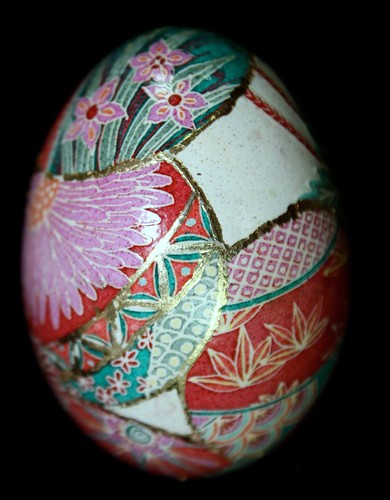
The following two photos are of an egg with the sizing applied after the first coat of varnish. The sizing was a bit "slippery" on the slick surface, so the edges are sloppy:

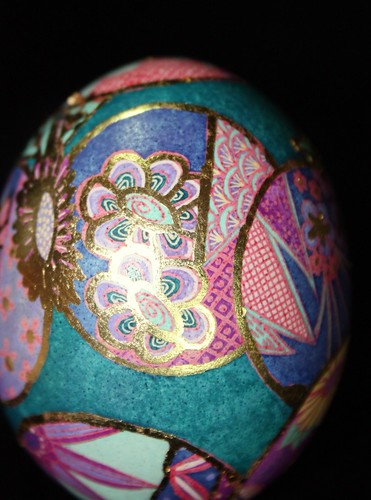
This last is an ostrich egg that was already varnished and finished, but I thought some gold accents would be a lot of fun. There's already so much going on with the design that I thought I might as well do some gold, too!


As you can see, there was some traveling of the adhesive sizing on this egg as well.
I did manage to fix my problem from last week of the gold sheet getting wrinkled before I even got it on the egg. Since I last bought gold leaf Mona Lisa Art Products has come out with a new product called Simple Leaf that has the gold leaf attached to a piece of vellum which you place on the adhesive. In theory, only the part of the gold leaf touching the adhesive comes off the vellum. In practice, it kind of tears off more that that, but a quick rub and scrub with a large paintbrush gets rid of the excess and the result is much more shiny and smooth than the regular gold leaf.
3 comments:
The third is my favorite! Soooo pretty!
The third one is my favorite! Soooo pretty!
that last one looks classy
Post a Comment