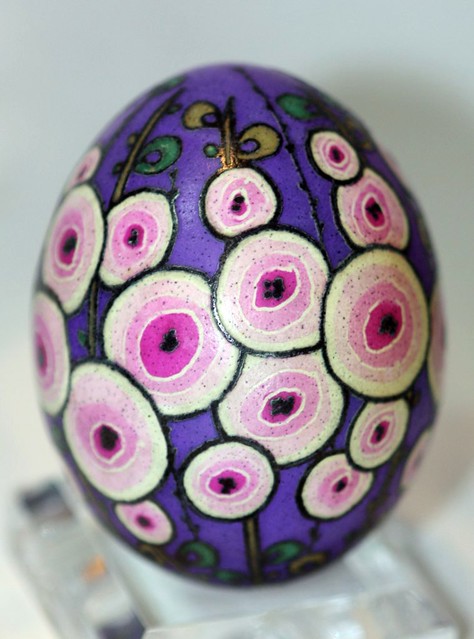
I mentioned the possibility of a tutorial a few weeks ago, and darned if I didn't follow through on it! Following is a tutorial on how to make the Hollyhocks egg I featured several weeks ago. If you follow the instructions and make one of your own, send me the photo so I can post it on the blog (or just so I can see it if you are shy.)
So without further ado, let us begin.
I started with a white egg, drained and cleaned, with the drain hole plugged up with a bit of wax and sealed. I dyed the egg
Black, making sure to turn it every few minutes so the egg would be evenly dyed and very dark. It is important to make the egg as deep a color (or in this case, non-color) as possible so that the outlines will be visible and obvious in the final egg. There's nothing more disappointing that finishing the last layer of wax and melting it all off to reveal something kind of boring, lame and without definition.
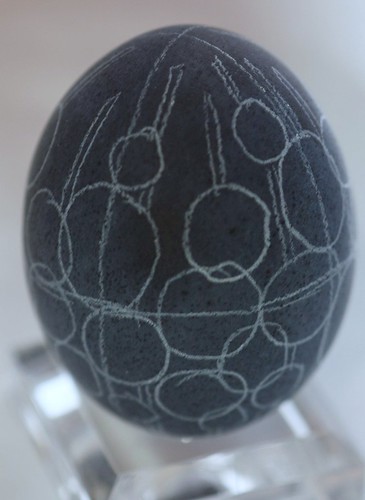
Once the egg was as dark as I needed, I dried it off and drew a few guidelines. You can see I drew horizontal and vertical guidelines, dividing the egg into 8 equal sections. It is not imperative, but just something I do so that I always know where I am going. I used a white colored pencil for this so that the lines would be visible against the black.
After our guidelines are in place, we are ready to start waxing! For the circles, I used a Medium point
electric kistka, and I used a fine point for the stems and leaves. I want the lines to be pretty chunky and sturdy because I will be etching the egg in the next step. If the wax lines are too fine, they can be etched away. After all my outlines are done, I wash some of the black dye off with Ivory dish soap (pretty much any soap will do, but avoid the ones with lotion in!) then put in full strength vinegar for several minutes to etch the surface.
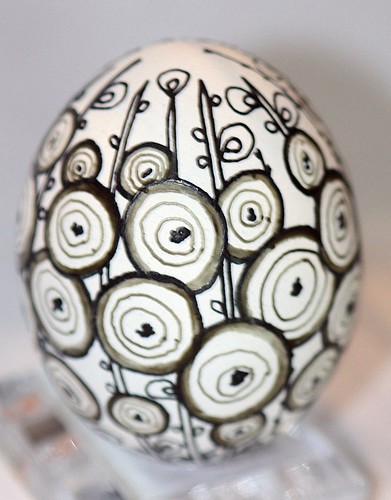
This is how the egg looks after waxing the black dye layer and then etching:
Now it is time to wax over the areas of the egg we want to remain white. I like to go from a dark center to a lighter edge on the flowers, so using the Medium kistka I draw a thick line right up against the black line at the edge of the flower. Using the fine point kistka, I draw concentric circles inside the flowers for my color layers. If you like, you can skip this step and not separate the layers with a white line.

Next we decide what color we want the flowers to be. I chose
Pink because it is a deep enough color to be able to dilute it with washing two more times.

As you can see here, we will cover the inner circle of the flower with wax. After all the deep pink areas are covered, it is time to wash the color to half strength or so. Just put the egg under running water, rolling it around in your hand and checking every few seconds to make sure you don't over-wash. If you do, just re-dye it pink and wash it again until you achieve the color intensity you like.

Now cover the next circle with wax and then rinse the egg under running water again until you get the color you like then dry and apply wax to this final circle.
At this point, we will be changing gears color-wise, so it is a good idea to wash off all the dye with Ivory soap.
I used
Harvest Green for the stems and some of the leaves. It is slightly gray and dull, but because the pink is so bright, I didn't want the green and the pink to be the same intensity and duke it out for supremacy. I want a peaceful little egg.

You can see in the middle that I blobbed! Sometimes wax just decides to plop off all at once. Usually I can catch it in time, but this one snuck by me. I will show you how it looks once I melt the wax off.
I wanted to use two different greens on the leaves, just for added interest. I chose
Jade Green to finish this layer.

Now for the final color - I chose
Violet, but you can choose anything you like. I tried dipping it directly from
Jade Green to
Violet, but the color was a bit too muddy, so I washed the egg back down to white and put it in
Violet.

After it dried for a couple of hours (see last Friday Egg for why I waited!), I put the egg in the toaster oven in a grocery store bought foil pan at 200 degrees F and melted the wax off. You can also do this in the microwave, but you MUST OPEN THE SEALED END OR THE EGG WILL EXPLODE!!! Sorry to shout, but it is enough to make you want to lie down for the rest of the day when that happens. I want you to be happy at the end of this, not sad. For the microwave, take a heated kistka tool and put it through the sealed end to unseal it. Nestle it in a paper towel that is placed in a small microwave safe bowl and heat 10 seconds at a time. When you see the wax get shiny, take it out and wipe off the wax. IT WILL BE HOT! Sorry to shout again, but it hurts to get molten beeswax on your fingers. I really like the low-key toaster over approach, but it is up to you.
Look closely at the next photo and you can see where I blobbed. I don't think it detracts from the egg at all, and is really not terribly noticeable so I am not going to worry about it. I pronounce the egg done!

You can really see in the next photo how the black lines are etched. All the other colors are lower and less shiny than black because the shell is roughed up from etching.
Happy Friday, everyone! I look forward to seeing everyone's Hollyhock eggs.