I love California poppies. My mom has them in her spring garden and they are such an eye-catching neon orange that they are impossible to resist. The Friday Egg this week is a goose egg sized tribute. I did a little bit with gilding which I don't think adds too much to the egg, but you can tell me what you think.
Friday, July 15, 2011
Friday Egg: California Poppy
I love California poppies. My mom has them in her spring garden and they are such an eye-catching neon orange that they are impossible to resist. The Friday Egg this week is a goose egg sized tribute. I did a little bit with gilding which I don't think adds too much to the egg, but you can tell me what you think.
Friday, July 8, 2011
Friday Egg: Dancing Scarlet Poppies
I love poppies. I love playing with the shapes of the petals, their dancing stems, seed pods and leaves. Everything about them is fun for me to draw. I really like the loosely dancing poppy stems paired with the traditional stars at the bottom part of the egg. A nice pairing of formal and informal, static and moving.
If you are interested in this egg, take a look at it on Etsy!
Happy Friday!
Friday, July 1, 2011
Friday Egg: Happy Owl
A completely contemporary egg this week! I am jumping on the owl bandwagon with this owl on a leafy branch. He was a lot of fun to make, just stripes and dots, nets and bars in bright and happy colors. I am working with the gilding, so added some golden dots to the owl body as well as the dots in the background.
Hope you like him! Happy Friday
Labels:
Animal,
Contemporary,
Dots,
Friday Egg,
Orange,
Owl
Friday, June 24, 2011
Friday Egg: Eight Poppies, Eight Ferns
A new design this week! I was just doodling along with my usual divisions and came up with this design of skinny triangles. I thought it was perfect for single poppies, sort of like a series of bud vases. And then the ferns fit right in since they are so geometric. I will be doing more of this design in the future, so keep an eye out!
I started with a white egg for the basic division lines. I used a medium kistka for the triangles divisions and the star design at top and bottom. Next was Golden Wheat, a rich deep yellow that I really love right now. Again, I used a medium kistka to make the division lines on the star at top and bottom. The poppies were done with the XX fine point kistka, and the fern leaves were done with a fine kistka. The next color was green, then orange, scarlet and finally black.
I hope you enjoy it!
Friday, June 17, 2011
Friday Egg: Purple and Orange Traditional Rose
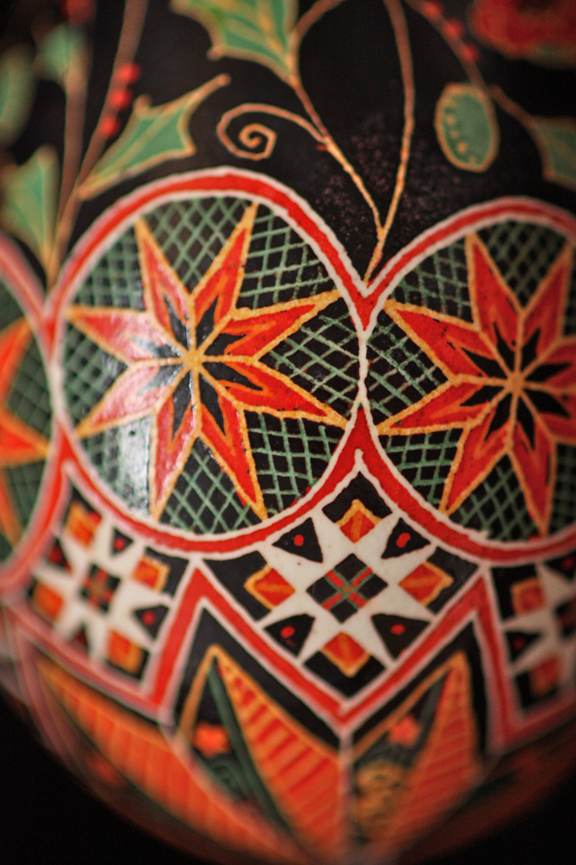
Purple, orange, yellow and green on a black background. This traditional Pysanka is one of my favorite designs to create. There's something quite satisfying about the balance of a central medallion on each side encircled with an eternity band. Just feels right. And no matter what color combination I choose, it always comes out lovely and exactly right. I started with a white egg, as is traditional, then went through yellow, green, orange, and purple then dyed it black for the final color.
Because it is a traditional egg, there are many meaningful symbols including:
- Nets = Protection
- Crosses = Christianity or the four corners of the earth
- Spirals/Curls = Protection from evil
- Dots = Stars or Spring (they represent eggs!) or Mary's tears
- Rose = Love and caring
- Diamonds = Knowledge
The eternity band is also a protection from evil. Because it has no beginning or end, an evil spirit will become trapped in the egg.
It's on Etsy if you are interested: http://www.etsy.com/listing/76200914/traditional-ukrainian-egg-stylized-rose
I hope you enjoy it!
Labels:
Friday Egg,
Green,
Orange,
Purple,
Traditional,
Yellow
Friday, June 10, 2011
Friday, June 3, 2011
Friday Egg: Etched Brown Egg
This is such an intricate little egg: I'm secretly tickled to make such an intricate and delicate design with a brown egg because they are so rustic and utilitarian that the rose design is doubly stunning.
I started my first layer on the brown egg, then etched the shell down to white using regular white vinegar full strength. It usually takes about 20 minutes for the shell to etch down to cream. After the etching bath I scrub it in running water with a baby toothbrush to clean it up and make sure all the dissolved shell is washed away. I dipped it in Avocado dye and drew in some details with wax, then dipped in Peacock Blue for the next layer of detail. Finally, I washed off as much of the blue dye as I could and then etched again to a creamy white. I listed it on Etsy today, so go visit if you are interested: http://www.etsy.com/listing/75338890/etched-and-dyed-brown-chicken-egg
Happy Friday!
Subscribe to:
Posts (Atom)


