Line by Line
I am loving this series! It is a series of drawing lessons that is actually quite helpful. My favorite is the lesson on how to draw plants, trees and flowers.
I would highly recommend that you take a look whether or not you are an artist. It is fascinating to see an artist work, how they work, the choices they make, all the things that go into creation.

Friday, November 5, 2010
Friday Egg: Protective Red Ram
 |
| Red Ram on Black Background |
I like the ram motif in traditional eggs. Spirals are traditionally seen as a protection symbol and the ram has it built right in! This egg has a lot of protection motifs: the "wolves teeth" that encircle the vertical eternity band as well as the tiny wolves teeth within the eternity band. I have always like the color combination of red and white. It is so strong and jaunty and cheerful with no doubts about itself.
 |
| Side view |
 |
| Top View |
 |
| Bottom View |
 |
| Penny for scale |
Friday, October 29, 2010
Friday Egg: Flying Turtle in Space!

A whimsical Friday Egg today! It is a turtle with a traditional star design shell flying through a flower and dot filled space with his upside-down buddy on the other side. The brightness of the colors against the black background remind me of folk art embroidery.
I started the regular way with a white eggshell, then just kept adding new colors. I washed the eggshell back down to white several times to ensure that the colors were bright and clear. Sometimes the colors can get a bit muddy and dark if you do too many successive layers of dye without washing back to white as a background again.
Enjoy your sci-fi traditional zoological space exploration egg!


Happy Friday!
Friday, October 22, 2010
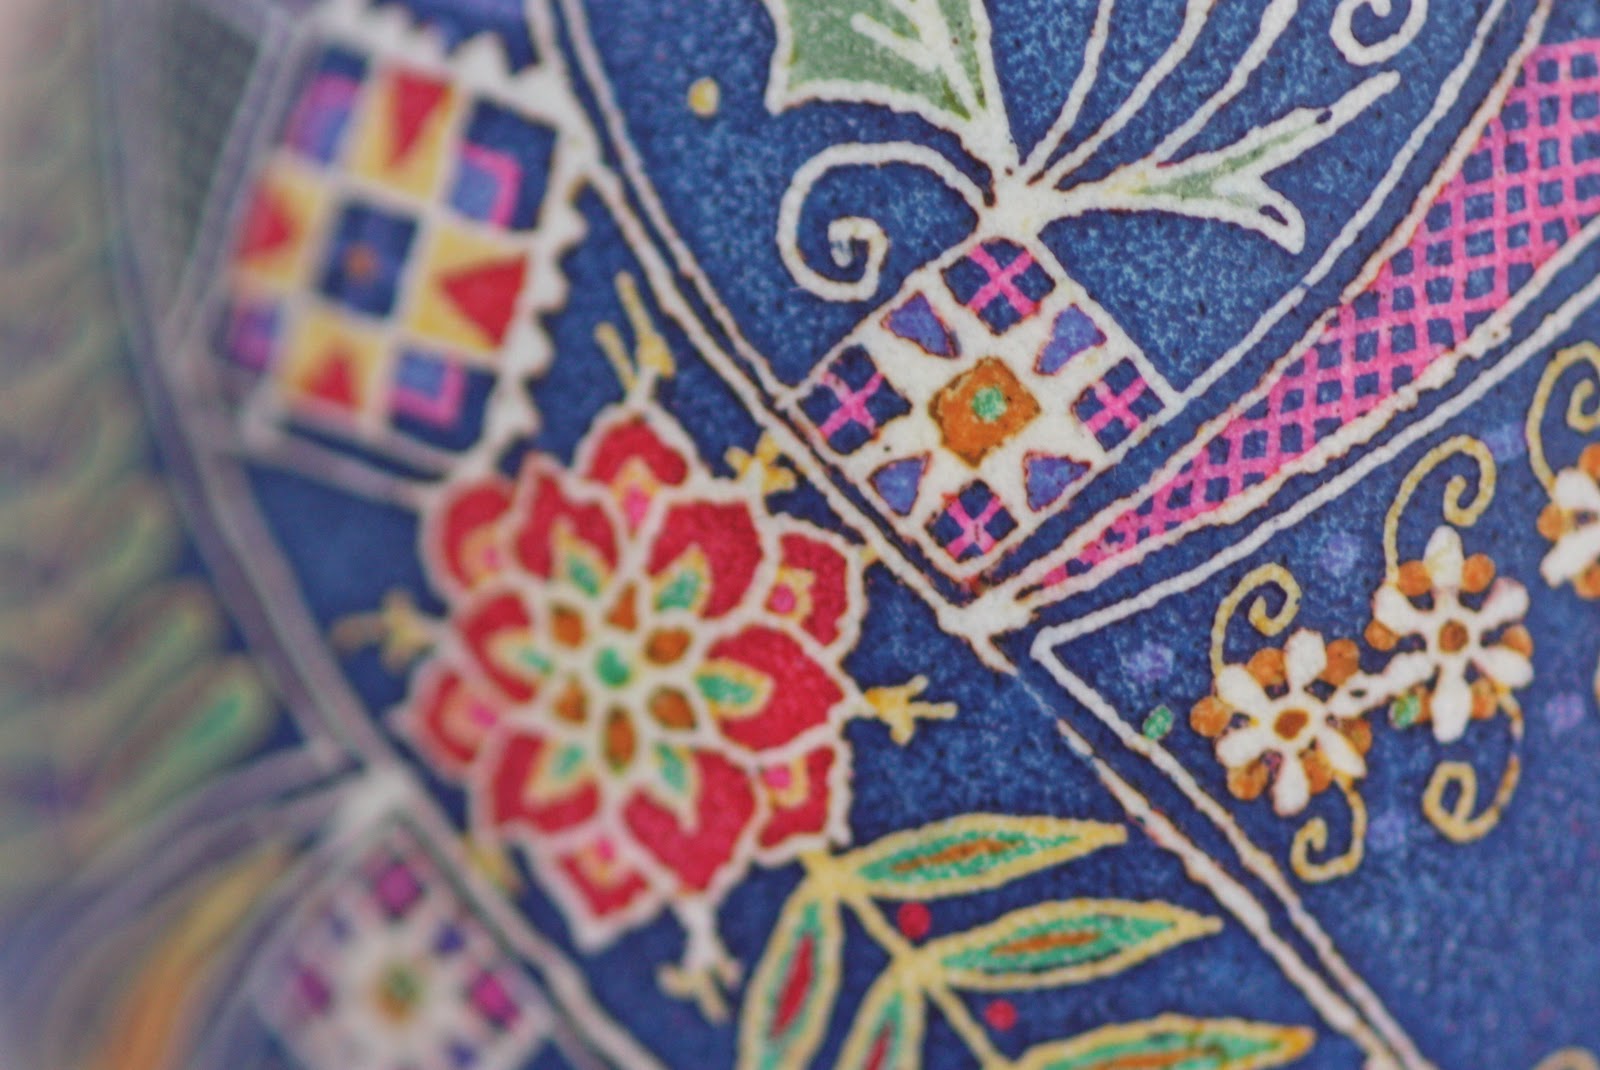
Friday Egg - Peacocks and Poppies!
 |
| Poppies and Peacocks! |
Friday almost got away from me! Lots of big things in the works, and I am starting to ramp up for the holidays. One thing I can announce today is my participation in the East Austin Studio Tour. This year it is two weekends, Saturday and Sunday, November 13th and 14th and Saturday and Sunday, November 20th and 21st. The hours are 11 a.m. to 6 p.m. and I will open up my studio and be demonstrating most of each day. We will have refreshments and beverages on offer. We had a great time last year and I am looking forward to doing it again. I hope you all can come out and say hello and take a look at some of my new creations. Speaking of which...
I made a beautiful blue Friday egg with orange poppies and peacocks. I started with a white egg and measured out a figure-eight design to frame the poppies in the inner circles and create frames for the peacocks out of the outside of the circular shapes. The orange is a little less intense than I would have liked, but I still like it with the cobalt blue background.
 |
| Peacock with blue tailfeathers |
 |
| Traditional Rose or Star Pattern next to garland |
 |
| Pretty orange poppy. I always call the orange ones California poppies. Is that right? |
 |
| Scarlet flower detail |
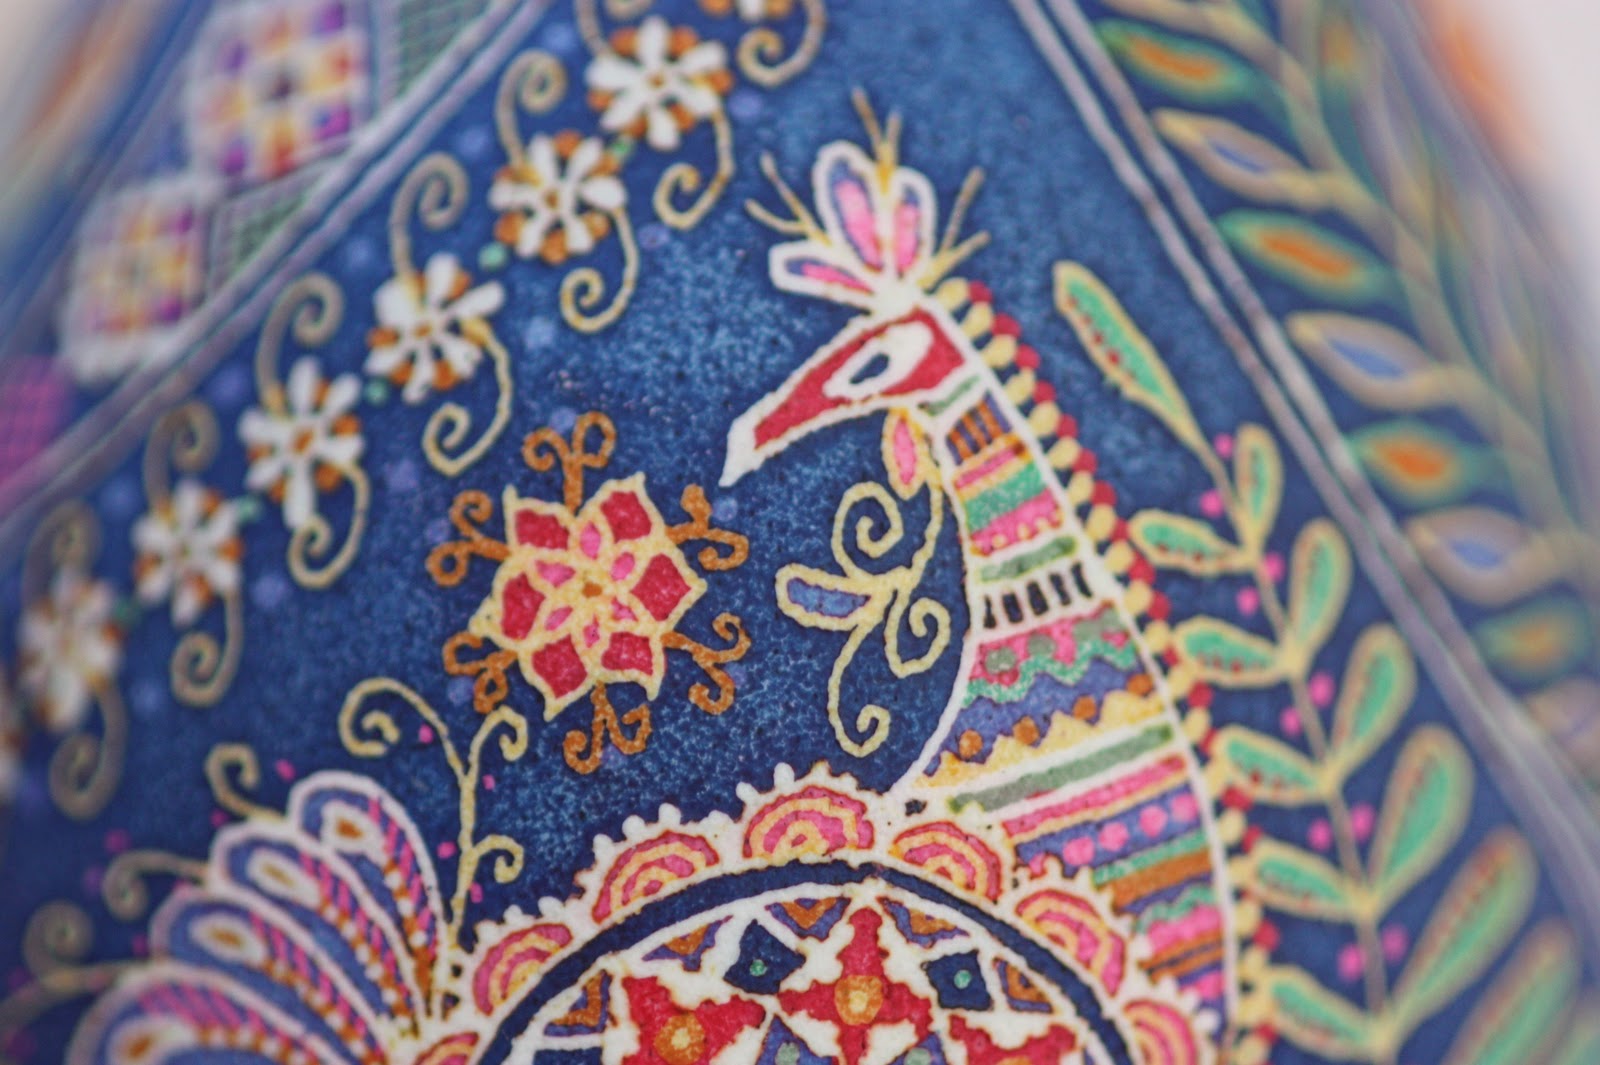 |
| Peacock is ready for his close-up. |
 |
| Red, green and blue garland |
 |
| Red initials on the bottom of the egg. |
Happy Friday!
Friday, October 15, 2010
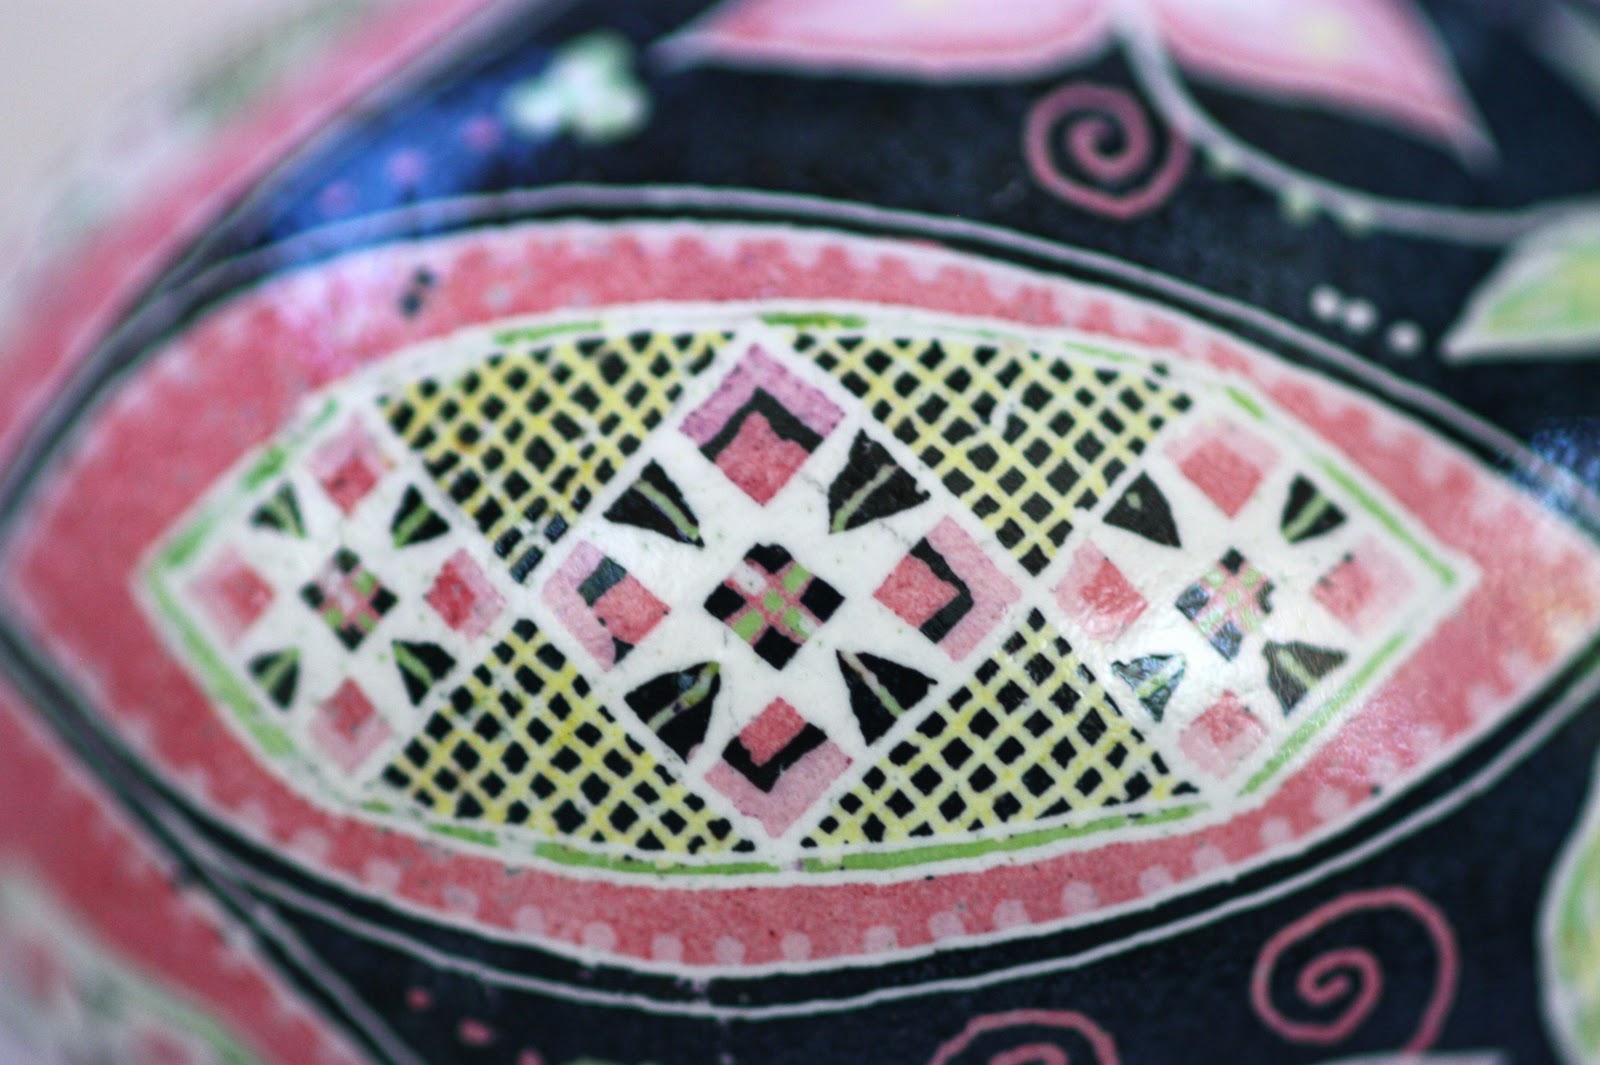
Friday Egg for Jennie

I am going to show two colorways of the same design because it is not only interesting to see how different colors affect the mood of the egg, but I also would usually not post the pink one because of various prototypical problems.
This is a truly hybrid egg using traditional elements arranged in a contemporary way with more modern color choices.


Happy Friday!

Friday, October 8, 2010
Friday Egg: Brown Chicken Egg Etched and Dyed
 |
| Brown Chicken Egg Etched and Dyed |
I have more wildflower eggs, but I want to shake things up! Today's egg is a brown chicken egg etched and dyed with a traditional design and non-traditional colors.
I started by writing wax on the brown eggshell, then etched to a lighter tan color with a straight vinegar bath. I dyed the egg with Temple Orange and waxed that layer, then dyed Peacock Blue and waxed, then washed the Peacock Blue down with a quick rinse of water to achieve the lighter blue color. Finally, I etched the shell down to the white layer of the eggshell for the background color. The combination of opposite colors orange and blue makes for a lively design that is pretty but not boring.
This is also a good egg to illustrate the pores in an eggshell. In the close-ups you can see tiny blue dots in the white areas. These are the pores of the eggshell that allow air to pass in and out of the egg. During the dyeing process, they fill with dye and become more visible. This is especially apparent in an ostrich egg which has large and deep pores that are highly visible.
After etching the last color, I found a crack that had been invisible before which runs from the white background area through the orange and blue triangle and into the cross pattern in the band:
 |
| Cracked! |
Oh, well. It's still pretty. What do you think?
 |
| Isn't she pretty? |
 |
| Side view - a slightly imperfect eggshell leaves a little bump in the white area |
 " " |
| Initialed on the bottom |
 |
| Close up of design detail |
 |
| Pretty orange flower |
Friday, October 1, 2010
Friday Egg: More Wildflowers

Riffing on last week's wildflower idea, I did a mixed bouquet this week. I started with a black egg to draw the "bones" of the flowers: stems, petals and leaves. After washing back down to white, I used a large sized delrin kistka to apply wax on the yellow, orange, green, dark green and red layers. I was looking for a blobby and imprecise "not staying in the lines" feel which is hard to achieve with the fine points of my electric kistky. I think that paintings of wildflower scenes are better when they suggest rather than illustrate - too much detail and precision makes it look like an awkward family photo. After red, I washed the egg back down to white and then dipped in vinegar for a while for a light etch to pop the flowers a bit more from the background.


And just a quick reminder: I have a basic Pysanky workshop scheduled for Saturday, October 16. Contact me if you are interested - the basic details are on the upper right side of the blog. It's coming up quickly!
Happy Friday!
Subscribe to:
Posts (Atom)